![]()
How To Clean a Chemex Without Scrubbing
I’m sure a great number of people have shared my struggle to clean coffee equipment that has a narrow opening. Coffee oils cling to surfaces and turn rancid. These rotten oils add undesirable flavors to your brew. Nasty! I had a long bottle brush, but it was a total PITA to get it in just the right shape to make sufficient contact. Achieving enough pressure to scrub the oils away was another challenge.
There Has to be a Better Way!
 Yes, there is a better way, and it is ridiculously simple to clean your Chemex, with absolutely zero scrubbing. This method will also work quite well with airpots, siphon brewers, as well as any other item that is made of metal or glass. I never use any detergents on plastic items, as plastics can hold onto cleaners forever. OxiClean is like a solid form of Hydrogen Peroxide, so it doesn’t seem to contain anything that would leave tastes behind, but I haven’t used it on plastic yet. Perhaps I’ll test it out on a cheapo Melitta.
What You’ll Need
- Hot Water
- 2T – 3T of OxiClean (Readily available at local stores)

Directions
- Add OxiClean to the Chemex
- Fill Chemex with hot water
- Wait 2-6 hours
- Rinse
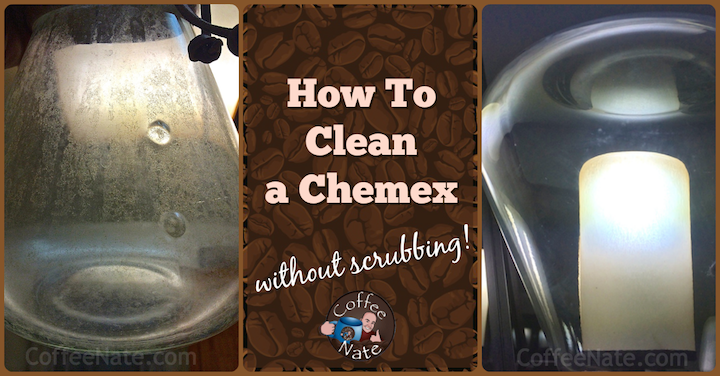
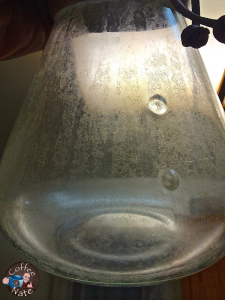
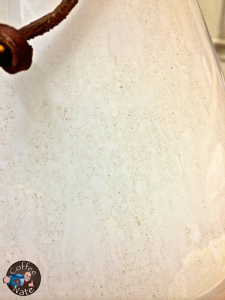
You see how scuzzy my 13-cup Chemex was. I used about 3T of OxiClean and let it sit for about 2 hours. I could immediately see the coffee oils lifting away from the sides of the Chemex. It was magical and sounded like a bowl of Rice Krispies.
Do you have any tips or tricks to cleaning coffee equipment?
If so, please include them in the comment section!
Here are more products that I love…
Find other products that I recommend in the CoffeeNate Shop!


Like Coffee? : The First Steps Towards Loving Coffee
So, you like coffee?
We learned the difference between “like” and “love” in junior high (at least we thought we did). You walked your sweaty-palmed self to the object of your affection, and s/he proceeded to stomp your guts out. Hopefully, your story ended better than mine. The point being, there are millions of people who “LIKE” coffee, but they don’t love it. They may think it’s love, but really they’re just fooling themselves and it’s puppy love. So how does one develop a deeper understanding of the coffee world? Just like everything else, you can learn through trial and error, or my personal favorite, learn from the mistakes that others have made!
Taking the First Step
If you’re already a specialty coffee connoisseur, then this message isn’t for you, but it may come in handy when you want to point someone to an introduction to better coffee. If, however, you’re currently drinking grocery store coffee, or subjecting yourself to $5 coffee drinks, this message is made especially for you. If you’re the latter, you probably do not realize that you are spending almost $2000/year. If you’re the former, do you realize that you are drinking a rancid beverage? The first step is admitting your need of help. Even if you think you are perfectly happy with your current situation, there is always room to improve upon it.
It’s All in the Grind
Most people don’t know that the coffee grinder is actually the most important element to brewing a perfect cup of coffee. Sure, you must start with great beans, and you need to have a decent brewer, but those things will be all for nothing, if you don’t have a suitable grinder. The popular home coffee grinder is a cylindrical looking appliance, with blender looking blades at the bottom. If you are currently using one of these, then you are needlessly drinking a poorly brewed beverage. All home brewing folks need a reliable, burr grinder. Why? There is only a percentage of the coffee bean that is soluble, and an even smaller percentage that you want in your cup. For this reason, each brewing method requires a specific, uniform coarseness of the coffee grounds. The blades on the cheapo models cannot possibly be made to create a uniform grind. A poorly ground batch of coffee will see many fines (coffee dust), as well as chunks, leading to too much of the fine particles being dissolved, as well as not enough of the chunkier pieces. Conversely, a properly ground batch of coffee for your brewing method, will result in the optimal amount of the coffee being dissolved into the beverage (extraction).
If you are going to brew regular coffee (non-espresso), then the most economical grinder that I can confidently recommend is the Baratza Encore ($129). To most of you, this may seem like a huge price to pay, but there are grinders that cost thousands! You will also realize an overall savings by having a well constructed grinder that lasts for years, allowing you to brew better coffee at home than in most coffee shops. Additionally, you will also be able to save on the brewer, as most people think that the bulk of their budget should be spent on the brewer. This is simply not the case. If you have $150 for your overall coffee equipment budget, I will tell you to get the grinder and recommend a $20 brewer. If you are strapped for cash, but you don’t mind a bit of an arm workout, I can recommend a $40 manual grinder, The Porlex. This grinder is a great choice for non-espresso folks, and its sturdy construction makes it a great travel grinder too.
Choosing the Right Coffee Maker
There are probably hundreds of different ways to make coffee, but most people opt for the automatic drip coffee maker. While not producing the optimal beverage, it is easy to use. The drawbacks to the auto-drip are internal cleaning/descaling, which is vital to maintain the internal parts as well as providing the best possible taste. Also, many of these brewers do not sufficiently heat the water to attain proper extraction. Personally, I stay away from any brewing system that is enclosed. If I can’t see that the parts are clean, then there is always a nagging voice in my head that is telling me that it’s dirty. Another advantage of manual brewing options, is the level of control over the entire process. I know how hot the water is, I know the equipment is properly cleaned, and I know how long the water is in contact with the ground coffee.
Here are a few options of coffee brewers that are perfect for the beginner, not requiring a great amount of learning, while only requiring a small amount of time and effort.
Off-Topic Plug: CoffeeNate readers can enjoy a 1 year subscription to Hallmark eCards for just $10 (20% savings)! Just use coupon code ECARDS2OFF at checkout. I’m always sending eCards, because they are much cheaper than traditional cards, but much more personal than saying “Happy Birthday” on my friends’ Facebook profiles (along with 500 other people). This 20% offer expires on March 31st, but even at $12, I’ve found this to be a good value.
You NEED Good Coffee
[Read more…]